Ginkgo.Your Innovation Partner.

As a (relatively new) software engineer at Ginkgo, I find myself intrigued and excited about everything there is to learn about software, working with a team of brilliant engineers, and the amazing problems Ginkgo solves on a daily basis. Amidst our COVID-19 efforts, I have learned it is imperative to understand the basics of version control systems, Git, GitLab, and processes specific to Ginkgo. My experience with Git and GitLab began about a year ago during my time in an immersive software engineering bootcamp. I thought I knew what I was doing. Fast forward to March, and I’m faced with the daunting task of rebasing. Through trial and error, I learned Git tips and tricks that I think would benefit a wide range of software engineers; whether you’re just starting out, a seasoned engineer, or someone who likes to have reassurance when working with sensitive code. Below, I will outline how Ginkgo uses Git and GitLab, as well as the common issues that a software developer might encounter when working with these systems!
First, you have to speak Git. Let’s start with basics, words you’ll hear in most team interactions.
Git is an open source, distributed version control system used for tracking changes in source code during software development. This basically means it manages changes to a project in a structured way, to coordinate changes made by different developers to the same code. Git uses repositories to store information. Repositories are storage spaces or directories in which your projects can live.
Git simplifies the process of working with other developers on a team. After team members work on different features, they can merge their changes to a common branch, typically called the master branch.
After you make any sort of change, a commit essentially takes a “snapshot” of the repository, with the changes you’ve added. The commit then stores the changes you’ve made since the last snapshot, and commits from different users can be seamlessly compiled as long as the two commits do not touch the same lines of code.
Install Git. How to: https://git-scm.com/book/en/v2/Getting-Started-Installing-Git
Obtain access to GitLab. We use GitLab CI to build our Python packages and Docker Images and to deploy them to our development and production environments. See: https://about.gitlab.com/
git clone relevant repositories. git clone creates a copy of the specified repository which you intend to make changes to. For example, on your command line, make sure you are in the appropriate directory. For this example, I created a new directory called “testing” using the command mkdir testing Go to your GitLab project and click on the “Clone” button, which should be on the upper right hand. From the dropdown, click on the “Copy URL” icon under “Clone with HTTPS”
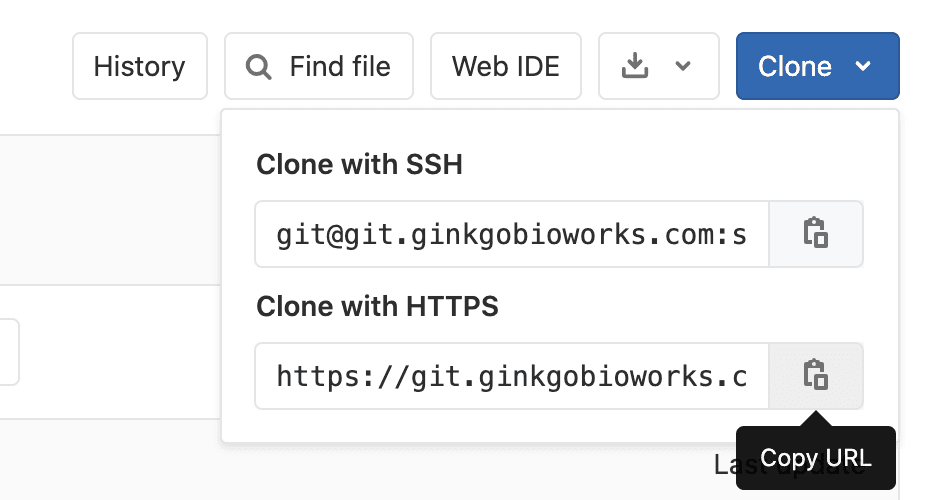
From your command line, run the command git clone <url>, where the <url> is the URL you just copied. That’s it!
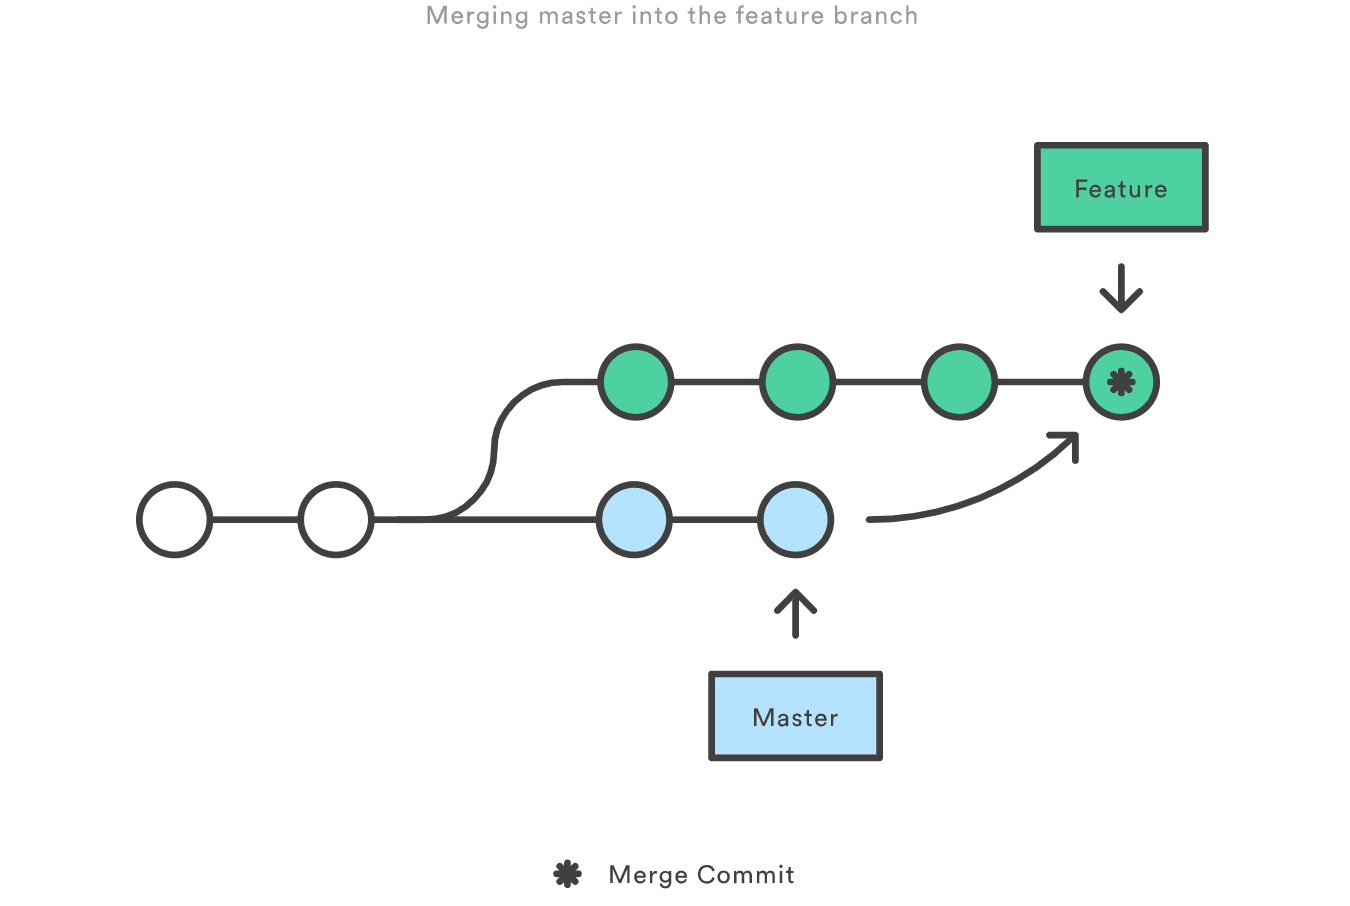
(Merging master into the feature branch by Atlassian Corporation Plc is licensed under CC BY 2.5 AU.)
For more information, visit this site.
Branches represent a new, independent path of development. At Ginkgo, the “production’ version of code is also known as the “master branch.” It is important to use branches so that you don’t make inadvertent, untested changes to production. Other developers are also simultaneously branching, too. When you’re done, you “merge” your code into the master branch. Other developers do the same. More on that later.
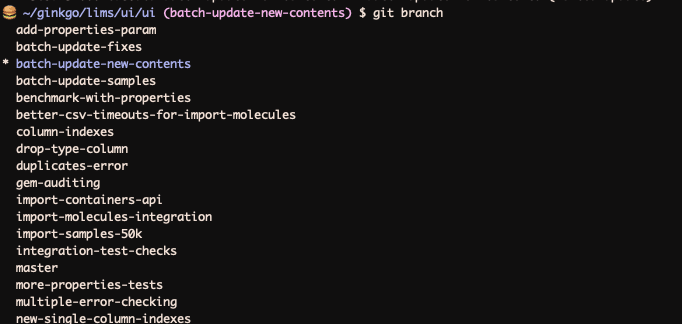
Run git branch in the appropriate repository to view a list of existing branches, as well as the current branch you are on.
It is important to use a descriptive phrase with dashes between words when naming a new branch. For example, if you are working on adding a navigation bar to the UI of an existing project, you could name the branch something like “add-nav-bar”. This way, other developers on your team can understand the change you have made, and it helps with tracking in the future.
Note: Each team is different! Make sure you check in with your team about naming conventions, commit message conventions, etc.
Sometimes, you might find that you want to change the branch name to be more reflective of the code changes. In this case, you might want to rename your branch. To do this, run the following commands on the current branch: git branch -m new-renamed-branch
Let’s say you want to check out a new branch, but you have uncommitted changes on the current branch you are on that you want to completely discard. If you want to ensure that those changes don’t get carried over to the new branch, run the following commands:
git reset --hard – This resets all of your local changes to the last commit.
git checkout master – This allows you to “check out” or navigate to another branch. In this case, it’s the master branch.
git pull --rebase – This essentially fetches upstream changes and rebases your branch.
git checkout -b new_branch – The -b in this command creates a new branch off of the branch that you are on.
See: https://education.github.com/git-cheat-sheet-education.pdf
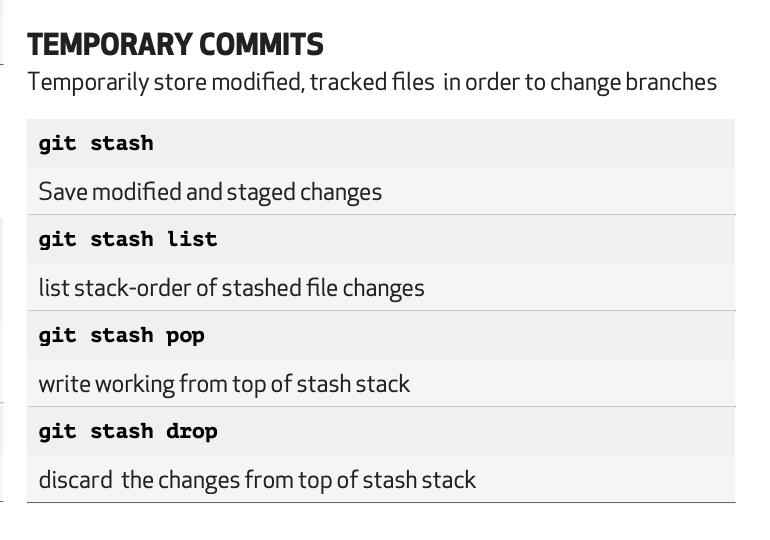
From https://education.github.com/git-cheat-sheet-education.pdf
Merging allows developers to integrate their individual changes to a single branch. In our case, this would be the master branch.
To submit a merge request, ensure you have added all of your changes using the following commands:
git add -u – This command only adds changed files that are already tracked by git. It is usually recommended to add files individually, so you’re not faced with accidentally committing secrets or random files that you didn’t intend to.
git commit -m "your commit message"
git push origin your-branch-name
After pushing your changes, your terminal should provide a link to create a new merge request. Visit this link, and follow the steps below:
Keep every merge request specific to one change. Before pushing your branch and submitting an MR, run git diff master to ensure that your branch only has the specific feature/change you intended
The GitLab CI/CD (Continuous Integration/Continuous Development) is a system that can be used for code deployment and development. GitLab uses pipelines to run jobs (instructions for a runner to execute and compile code) that get executed in stages. After pushing changes and creating a new merge request, make sure the pipeline succeeds before assigning a code reviewer.
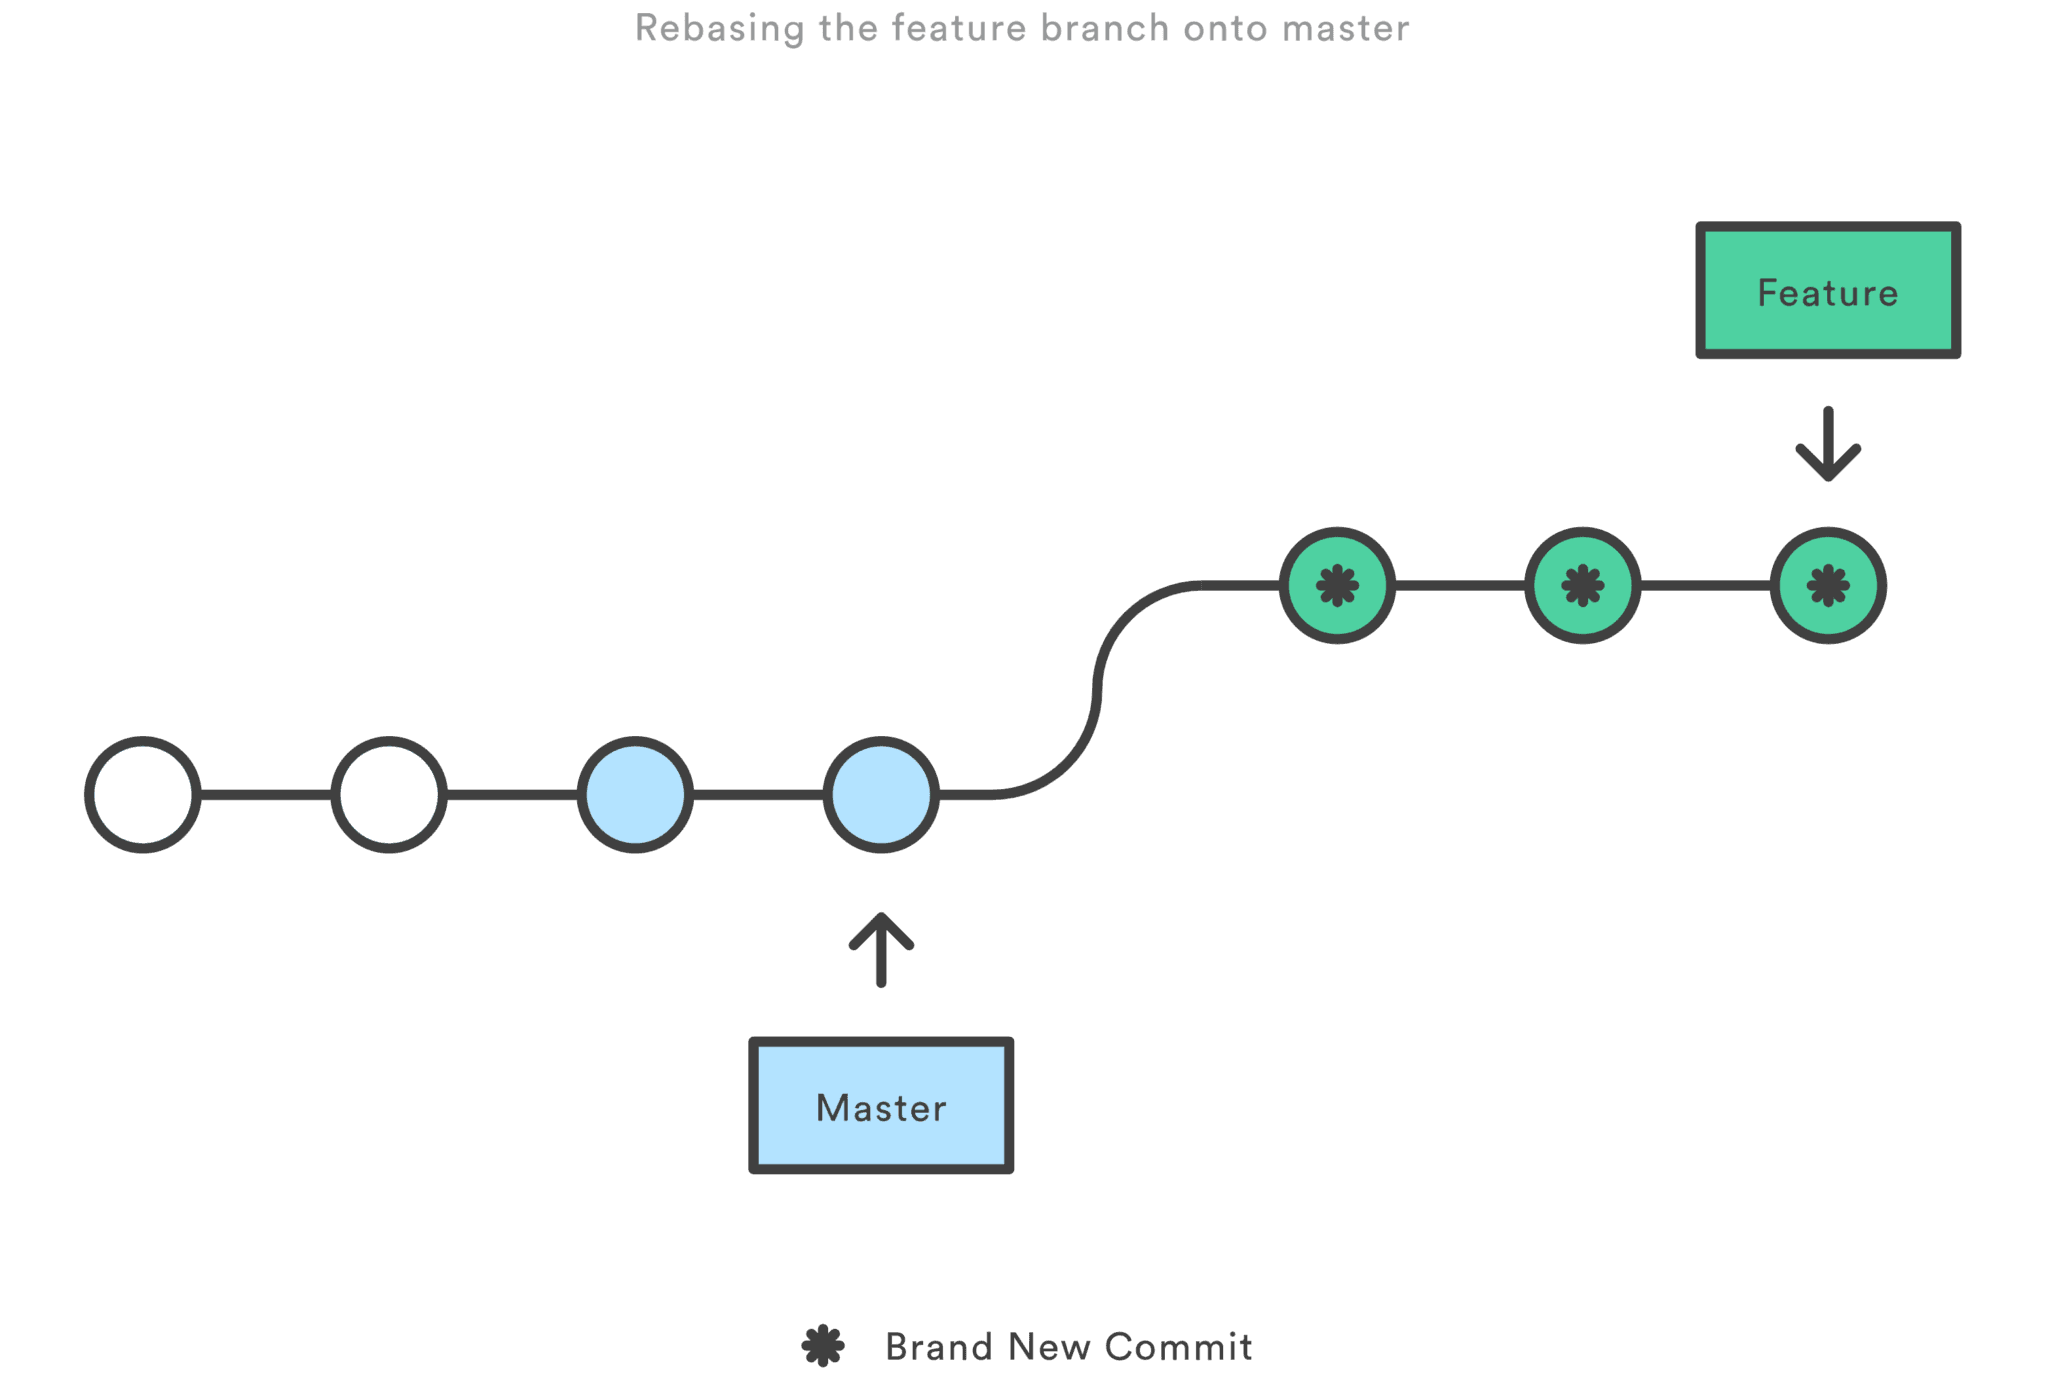
(Rebasing a feature onto master by Atlassian Corporation Plc is licensed under CC BY 2.5 AU.)
Rebasing integrates changes from one branch into another. You typically do a rebase when the master branch is ahead of your branch, and you want to integrate those changes into your branch. Rebasing differs from merging by rewriting the commit history in order to produce a straight, linear succession of commits. Often, if you see a message in GitLab that says “There are merge conflicts”, it is likely that you need to rebase your branch.
Let’s say you’re working on adding a new feature to a project, and another developer on your team is simultaneously working on a different feature (in a different branch). It is important to note that your branch will not be up to date with the master branch if your teammate merges their changes before you. If this is the case, however, we use a setting in GitLab that ensures branches are up to date with master before merging, so we need to rebase when others have made changes to master.
To rebase your branch, follow the below commands in the appropriate repository:
git checkout master
git pull
Switch to branch (i.e. git checkout your-branch-name)
git rebase -r origin/master
The following lines are only necessary when there is a rebase conflict:
git status
Resolve changes in files that are highlighted.
git add -u
git rebase --continue
Continue following the above steps until rebase is successful. When pushing to Gitlab after rebasing, you’ll need to use git push --force-with-lease origin your-branch-name. Don’t be alarmed, this is normal! This is important because otherwise it could overwrite someone else’s work.
One way to undo the last commit is to run the command git reset HEAD~1. Additionally, if you’d like to undo a few commits, you may change the “1” in the above command to specify the number of commits you’d like to reset back to.
Use the command git restore to undo everything. If you’ve staged something and want to unstage it, run git restore --staged foo, where foo is a file name.
git reset --hard resets the whole branch to the last commit — be careful doing this! It will undo all of your changes.
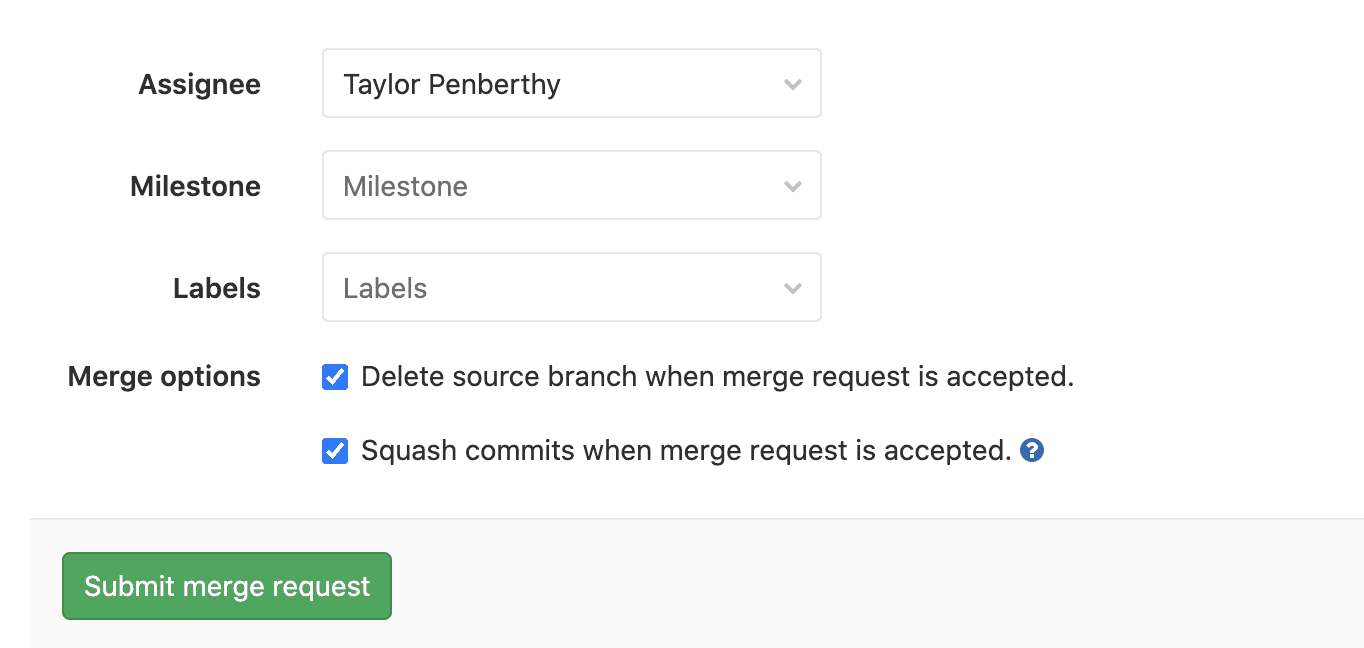
Merging your branch should only occur after it has been reviewed and approved by another developer on your team. Different teams have slightly different conventions for approval, so make sure to check in with your team! When submitting a merge request, it is good practice to select “squash commits” and “delete branch after merge” on GitLab, as shown below:
Squashing commits results in a clean Git history which improves readability for your team. For example, say you have a commit history like so:
428239482hfs2... Added new UI feature, JIRA #321
1381ndj1o193... fixed error in failing test
32891njk189... small typo fix for other failing test
289b3kj723... made suggested changes
327823jfds89… hopefully this is the last!
382nvs328h... implemented small feature
923n9ds9824... last code iteration
Well, that simply gives me a headache to look at. Instead, after squashing your commits, the commit history will look something like this:
428239482hfs2... Added new UI feature, JIRA #321When you are ready to merge, GitLab provides a “merge” button on the merge request. It is best practice to use this button!
After merging your branch, follow the steps below to update your local repository:
Switch to master branch locally by running git checkout master
Run git pull
Delete branch locally using git branch -d branch-name
Always checkout a new branch from the master branch. To do this, follow the steps below in your terminal in the appropriate repository:
git checkout master
git pull
git checkout -b your-branch-name
Forget a Git command? Run git help to view a list of the 21 most common Git commands.
Git tips: https://about.gitlab.com/blog/2020/04/07/15-git-tips-improve-workflow/
Git aliases: https://git-scm.com/book/en/v2/Git-Basics-Git-Aliases – Git aliases are useful because they allow you to do less typing — efficiency is key in development! i.e. using “git co” instead of “git checkout”.
(Feature photo by Xavi Cabrera on Unsplash)
Posted by Taylor Penberthy


